The MetaMask Cryptocurrency Wallet is primarily used to communicate with the Ethereum blockchain, however, you can manually add a number of other networks in a few short steps.
In this tutorial, you will learn how to configure your MetaMask Wallet to work with the Binance Smart Chain Network .
STEP 1
Log into your MetaMask Wallet

STEP 2
Click on the three little dots at the top right corner, then click on “Expand view”. This will open MetaMask in a full-page browser.

STEP 3
Click on the colorful circle at the top right corner of your MetaMask Wallet which will open the menu. Then Click on “Settings” at the bottom of the menu.

STEP 4
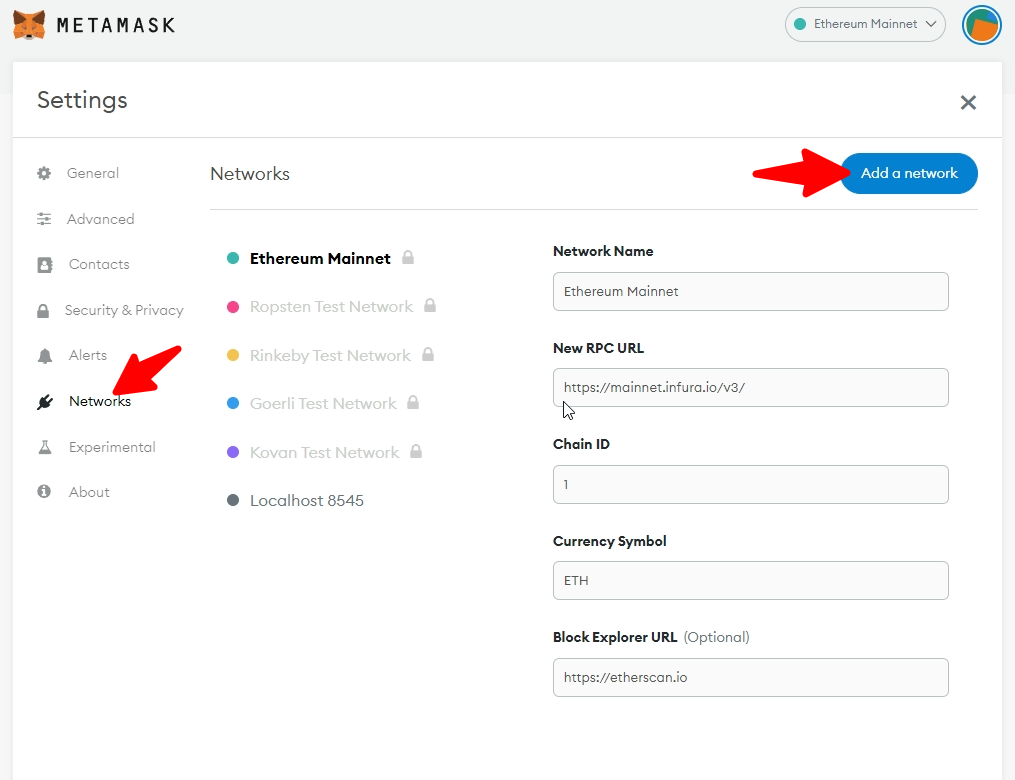
Click on the “Networks” link in the left column menu, then click on the blue “Add a network” button at the top right corner of the page.

STEP 5
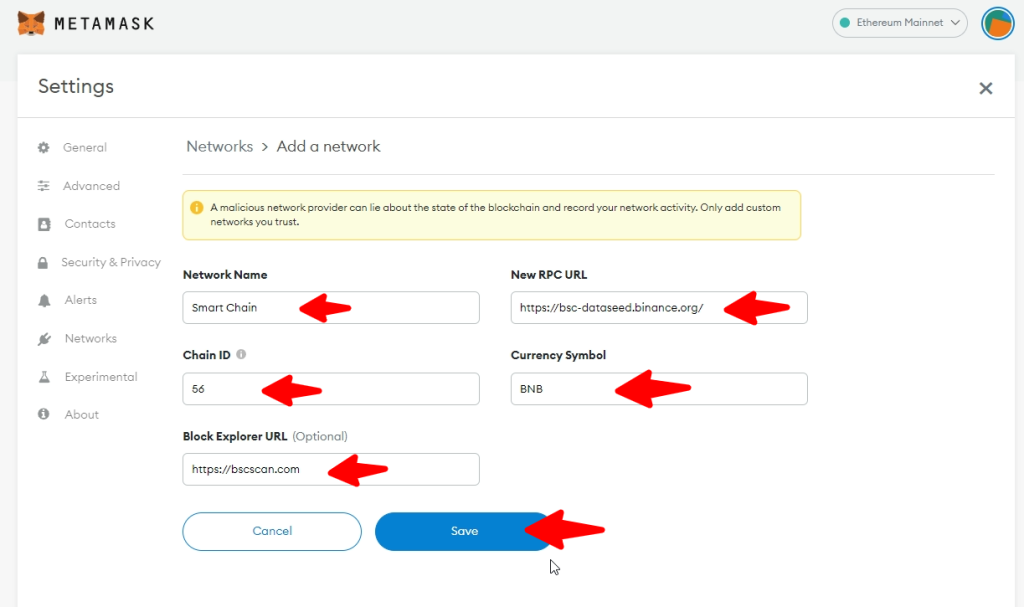
Add the following details in the correct boxes:
Binance Chain Mainnet
| Network Name: | Smart Chain |
| New RPC URL: | https://bsc-dataseed.binance.org/ |
| ChainID: | 56 |
| Symbol: | BNB |
| Block Explorer URL: | https://bscscan.com |

Once the above details are entered correctly, click on “Save“
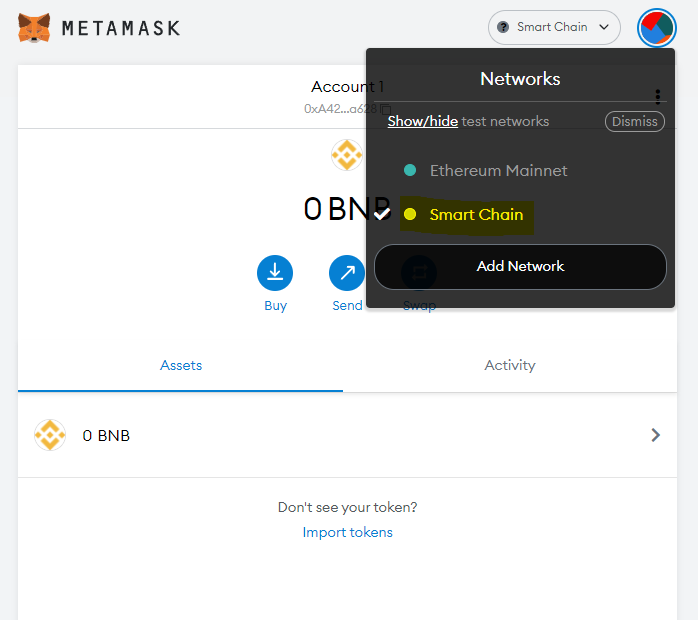
Congratulations, You have now added the Binance Smart Chain Network to your MetaMask Cryptocurrency Wallet!
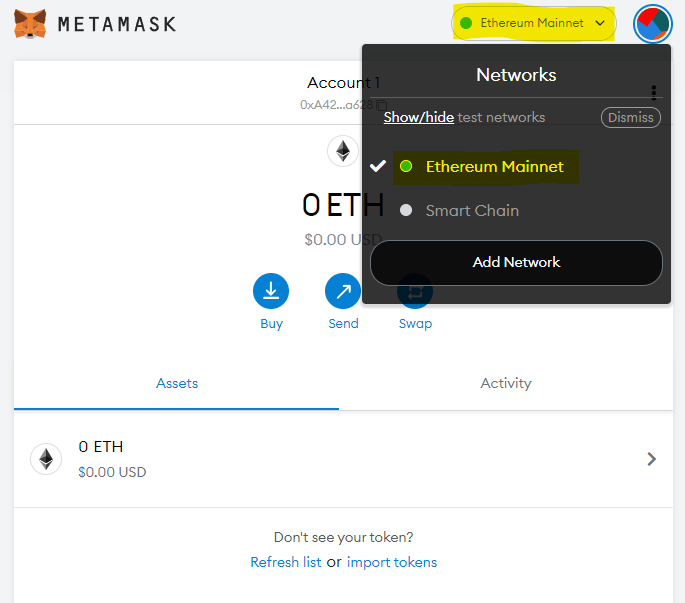
To switch between networks click on the box at the top right corner and choose which network you would like to display.


If you have any questions feel free to ask below.


Add comment